Muskie Discussion Forums
| ||
| Random quote: "It's pretty bad when the only reason they take me is to net their fish. Huh!!" - (Added by: Turkeyt) |
| Moderators: Slamr | View previous thread :: View next thread |
| Jump to page : 1 Now viewing page 1 [30 messages per page] More Muskie Fishing -> Basement Baits and Custom Lure Painting -> creepers & a injured topper |
| Message Subject: creepers & a injured topper | |||
| RyLure |
| ||
Posts: 46 | These are some new ones i just recently completed, they are made of cedar, and have hand cut metals, in a few funky colors too, pm me if you have any questions. Ryan 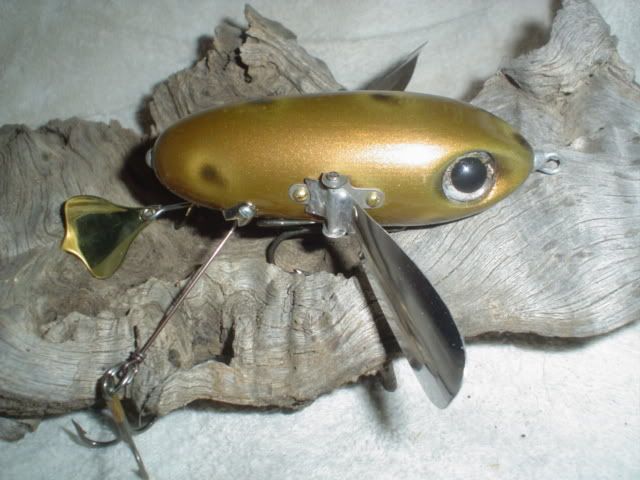 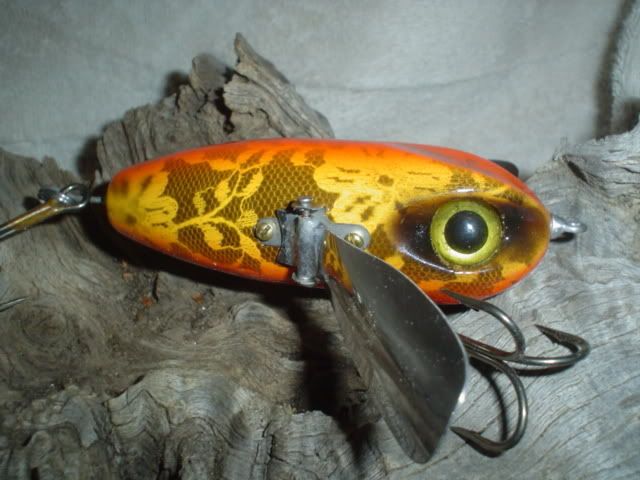 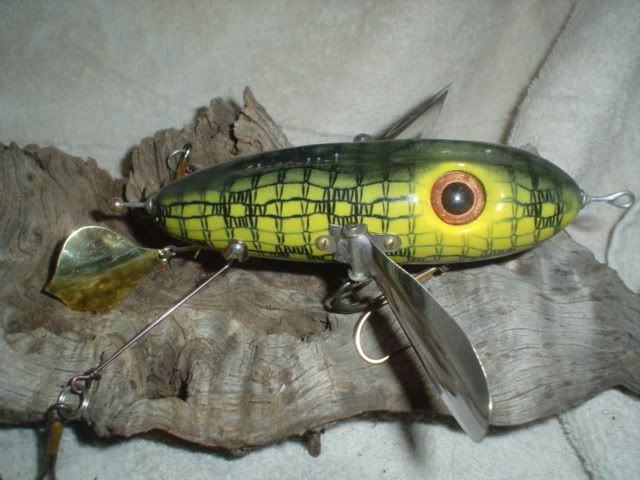 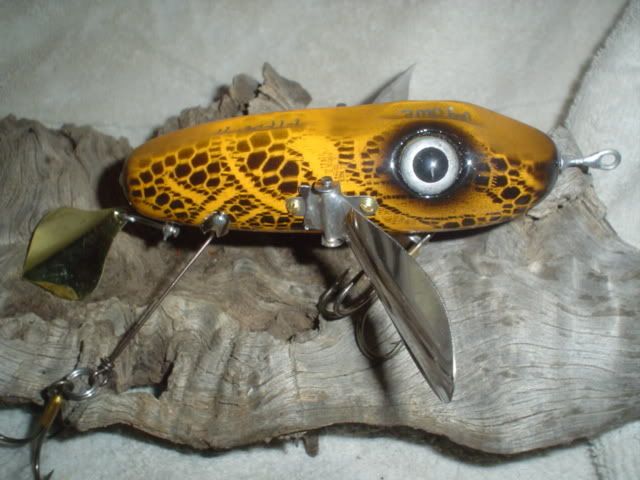 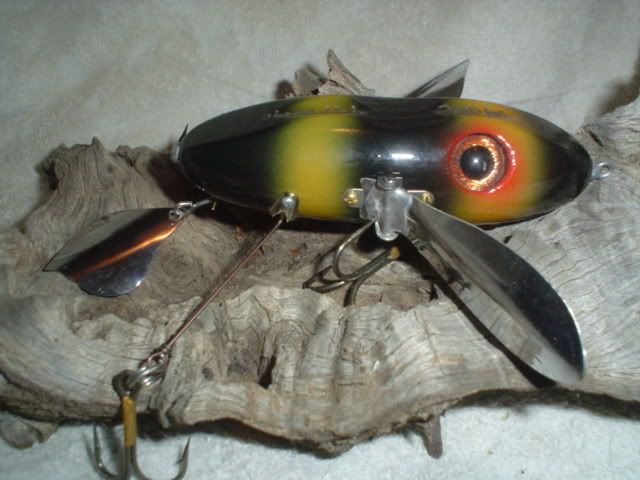 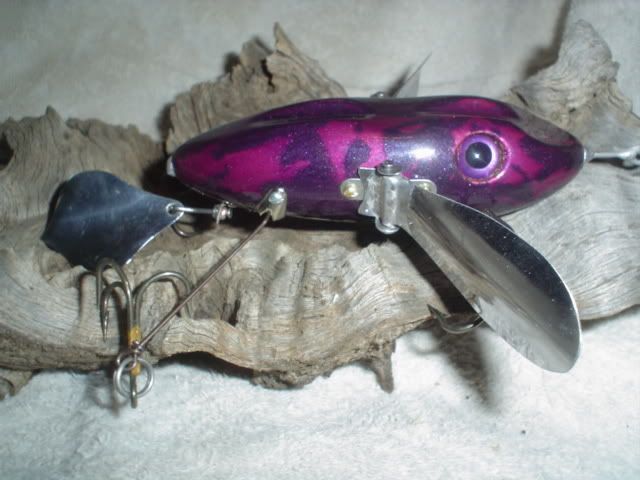 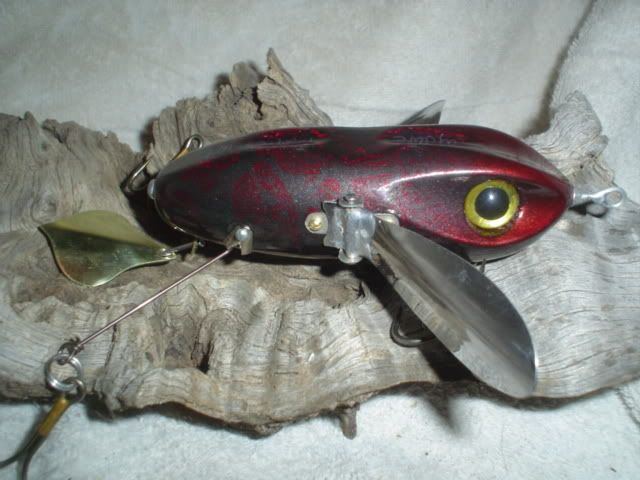 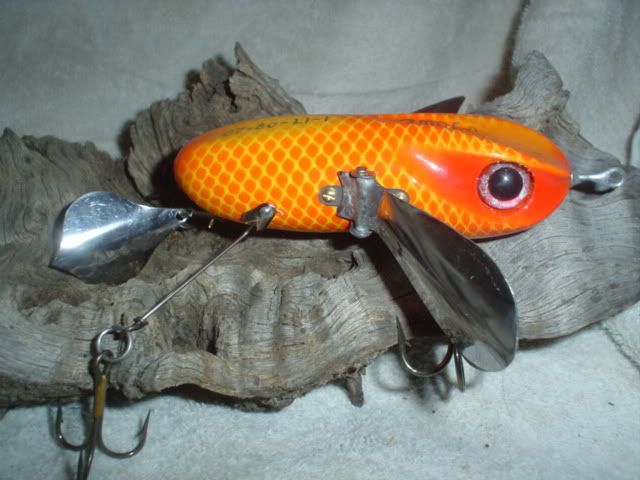 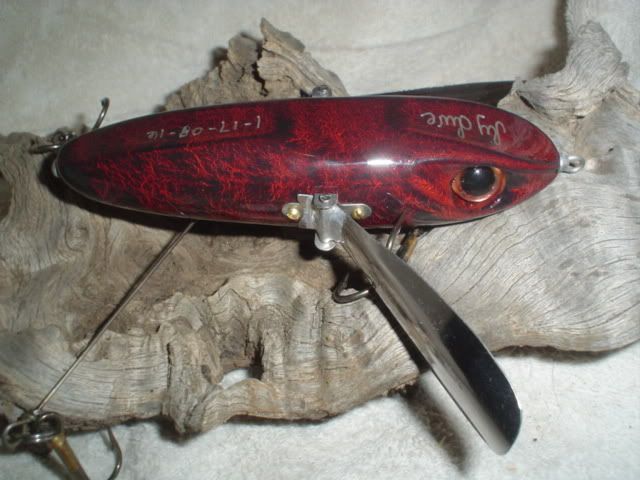 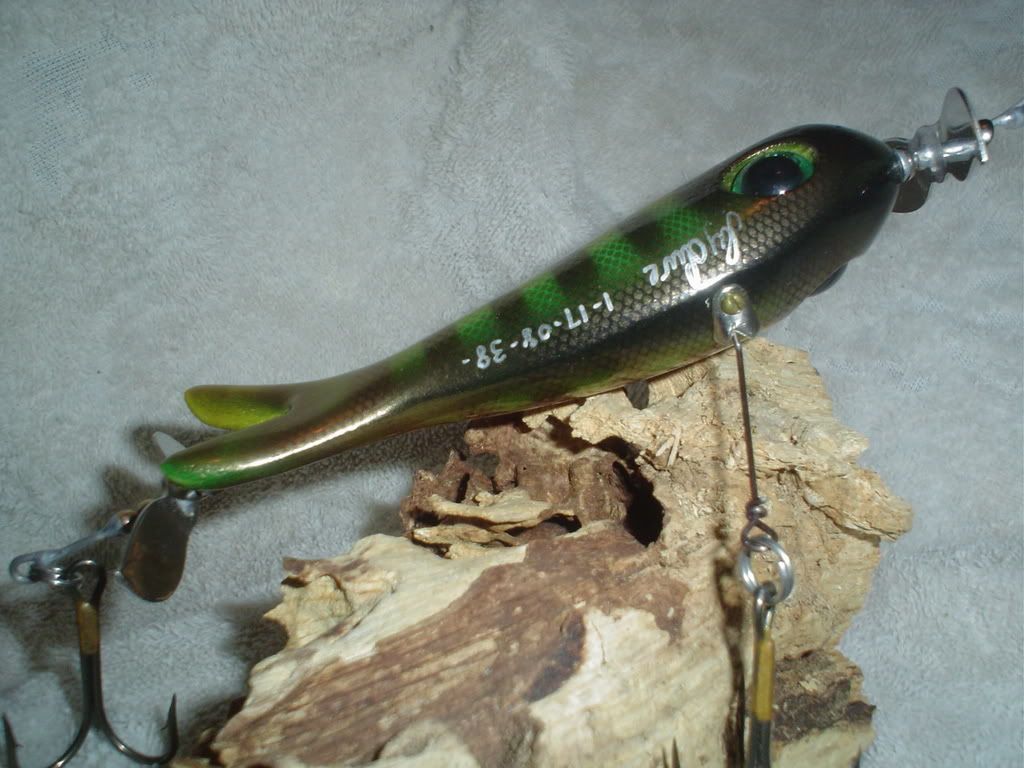 | ||
| CollegeMuskyHunter |
| ||
| Two questions: One, do you hand carve your creepers or do you lathe them then carve? And two, how long are most these from wire to wire and how long is the wood? I'm getting into the first stages, I'll have some posted soon. | |||
| RyLure |
| ||
Posts: 46 | On most of these, loop to loop is 6.5-7.5'', with the body being 4.5-6'', as for the wood crafting process, some are lathed & belted, others carved by hand, most are a combo of lathe, belt, and hand carving. | ||
| castmaster |
| ||
 Posts: 910 Location: Hastings, mn, 55033 | All look great, and the topper is VERY cool!! | ||
| Guest |
| ||
| Those are awesome! One question-how do you get that bowling ball effect on the black/red one above the topper? That is sweet! I have never seen a paint job like that. | |||
| RyLure |
| ||
Posts: 46 | The crackled one, that is done by taking a slow drying paint, and putting a fast drying paint over the top of it, the top layer of paint then dries before the slower one under it does and it "crackles". | ||
| CollegeMuskyHunter |
| ||
| How are you getting the hole drilled all the way through the center? I'm assuming you are using either .051" or .062" dia. wire, which would mean a 1/16th" drill bit, yet I can't find one that long? (I have some bodies made and I'm now stuck) Should I keep looking? Or do you have any tricks? | |||
| RyLure |
| ||
Posts: 46 | i use an 1/8 '' drill bit to drill through the body after it's been turned, and i use 0.62 or 0.71 wire, i solder the wire to an 1/8'' rivet to secure the wire which fit's perfectly in the 1/8'' hole, it's epoxied in and i do the same on the other end of the lure, this method prevents the wire from spinning and makes the lure track better. | ||
| Brian Kroll |
| ||
Posts: 66 | Those are sick. I like the angry look!! Awesome!! | ||
| Guest |
| ||
| I have been having trouble with my drill bit wandering to the side. Is there a trick to drill the hole right down the center without it wandering? | |||
| RyLure |
| ||
Posts: 46 | i start with a short bit first, to get a good straight hole started, and you have to do this on both ends of the lure, call this the pilot hole, then you take the longer bit and meet the two holes somewhere in the middle of the lure, if you try to drill thru entire bait in 1 pass with a long bit you'll have very little success, woodgrain will pull a flimsy bit all over the place, also make sure you are useing a high quality bit(s) | ||
| castmaster |
| ||
 Posts: 910 Location: Hastings, mn, 55033 | I do the same as Ryan. Sometimes I use my Dremel tool with a 6" bit to get the pilot holes to meet up. The high speed of the dremel seems to help drive the bit through the grain instead of following it. | ||
| RyLure |
| ||
Posts: 46 | I should have mentioned too that you don't wanna cut your ends of from where the wood is held in the lathe , that is your center, start your drilling before cutting the ends off, and if your're doing a 2 piece lure, don't try to drill thru the whole thing, after your pilot holes are drilled, cut the ends off, and if it's a 2 piece lure, cut that in half too, it's tedious, but you'll get better results this way, on 2 piece bodies, where you cut it in half, poke new scribe holes with an all where it's been cut in half, and drill new holes to meet the other holes you drilled from the other end, this will ensure a perfectly straight hole on both pieces. it's a pain. | ||
| Tackle Industries |
| ||
Posts: 4053 Location: Land of the Musky | Nice lures! Might have to hit you up for a trade some day James | ||
| PEteacher44 |
| ||
Posts: 303 Location: WI | What's the difference in sound with the flap-tail vs. a prop blade on the tail?? Just curious...I don't own anything with a flap-tail... | ||
| RyLure |
| ||
Posts: 46 | the prop style gives a consistant mettellic churgling sound, the flaptail version comes in 2 style's, with the wire extended in the back with a brass bead soldered on the end that the flaptail makes contact with, or, the wire not extending, and soldered flush, the flush model does make some contact with the flush rear rivet, it's more of a random clink-clink, where the ext wire model makes a consistant clink-clank higher pitched met sound, the flaptail actually pivots back&fourth on the bead on the ext wire, a really different sound for sure, and quite effective on anything i put that style tail arangement on, it's not a bad deal. | ||
| CollegeMuskyHunter |
| ||
| I've got some bodies drilled and painted up, what do you use for a top coat? These are just for my personal use, looks to myself aren't very important. I'm assuming some sort of epoxy would work best?, but would a polyurethane spray do the trick? What do you use? | |||
| Jump to page : 1 Now viewing page 1 [30 messages per page] |
| Search this forum Printer friendly version E-mail a link to this thread |


Copyright © 2026 OutdoorsFIRST Media |
