Muskie Discussion Forums
| ||
| Random quote: "The Thrill Is The Catch,NOT THE KEEP;" - (Added by: kevin) |
| Moderators: Slamr | View previous thread :: View next thread |
| Jump to page : 1 Now viewing page 1 [30 messages per page] More Muskie Fishing -> Basement Baits and Custom Lure Painting -> Bucktail Epoxy |
| Message Subject: Bucktail Epoxy | |||
| anderj85 |
| ||
Posts: 273 Location: US | I'm still new at this, but I've used hard as nails and then used Gorilla Glue 5 minute epoxy for finishing marabou coils. My only complaint is the amount of air bubbles in the epoxy. I've thought about using rod guide epoxy, but would like something that dries a little faster. Obviously faster drying 5 minute epoxy means less time for the bubbles to work out, just wondering what everyone else uses here? Would heating the epoxy after mixing help? | ||
| BornToFish1 |
| ||
Posts: 51 | Greetings, I use head cement to seal the threads on my in-line and bent-arm spinnerbaits. I buy this at most any fly shop. I find it easiest to apply from the small plastic bottles that have a needle tube at the top. They are normally right next to the head cement. It takes a few minutes for the head cement to dry. I use the head cement quite liberally and often! I know other guys that tie their own that use finger nail polish. Both work well! Good fishing and tight lines!! | ||
| anderj85 |
| ||
Posts: 273 Location: US | Yeah, I'm using hard as hull head cement through the tying process and once it's dry I use the epoxy to finish. The head cement dries quickly and hard, I just like the final epoxy coat as it makes a smooth finish that hides the thread. | ||
| Pal |
| ||
Posts: 665 Location: Twin Cities, MN | I have used Duco Cement with very good success. Pal | ||
| Zib |
| ||
Posts: 1405 Location: Detroit River | When mixing up the epoxy spread it out on a piece of aluminum foil before applying it to the threads. This will help eliminate most of the air bubbles. | ||
| buckeye |
| ||
Posts: 38 | Warming the expoxy in the tubes with a heat gun or hair dryer will help with the mixing and help some with reducing bubbles. Also you can add denatured alcohol to the epoxy to thin it down and lengthen the cure time. When adding the denatured alcohol I use a syringe. Warning one drop goes a long way. | ||
| anderj85 |
| ||
Posts: 273 Location: US | Thanks guys, I'll give these suggestions a try | ||
| austin_0_4 |
| ||
Posts: 10 | I have used multiple different epoxies with good luck. What I do is lay out equal parts epoxy side by side, then add a drop of water based paint, mix well, and apply. I feel like I get a good look and since I have done it this way I am yet to get any bubbles. There might be some small bubbles in there but ya sure don't see em if they are. It also gives a guy color options to match up with the color feathers used. The paint I like is by Createx i think. Its the airbrush ready stuff used on model cars. Works great. | ||
| anderj85 |
| ||
Posts: 273 Location: US | I'll have to try some paint too, if the epoxy wasn't clear, I'd probably never notice the air bubbles since they are very small. | ||
| anderj85 |
| ||
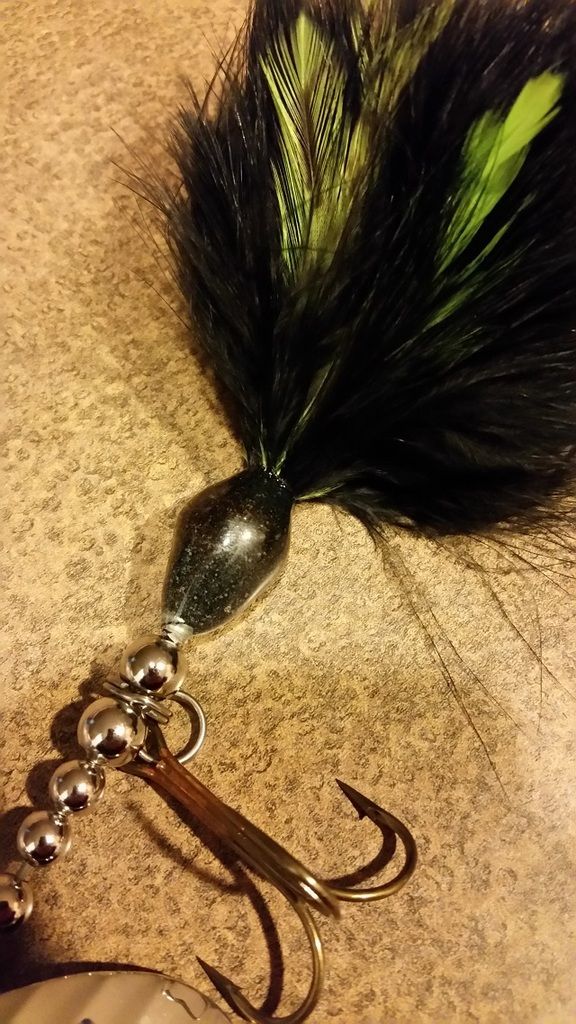
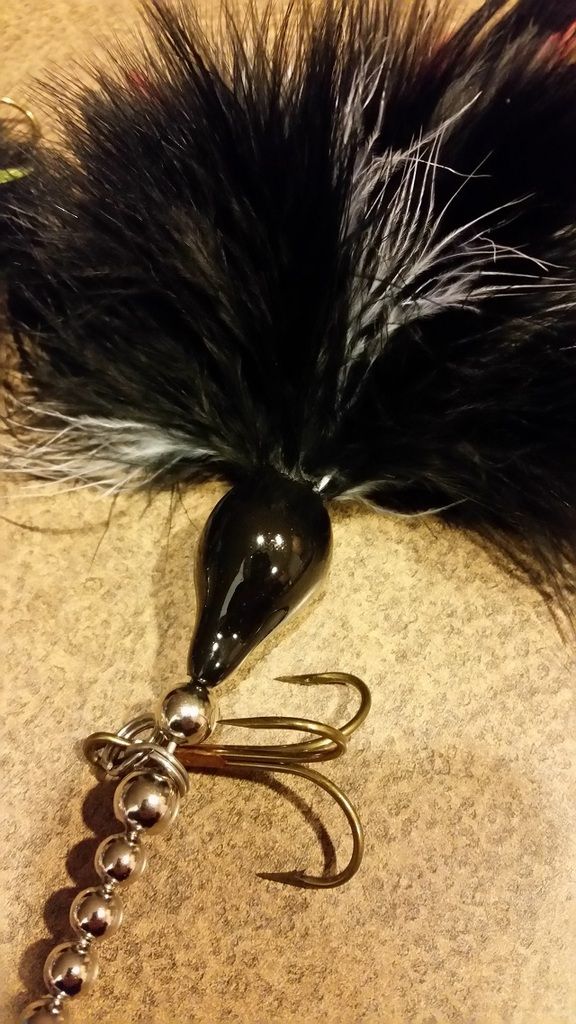
Posts: 273 Location: US | I had time to try this again with much better results. I still used the gorilla glue 5 minute epoxy, but heated it up in the tubes first and then mixed it up on some aluminum foil. I also added a drop of black paint.
This is the first attempt with air bubbles in the epoxy
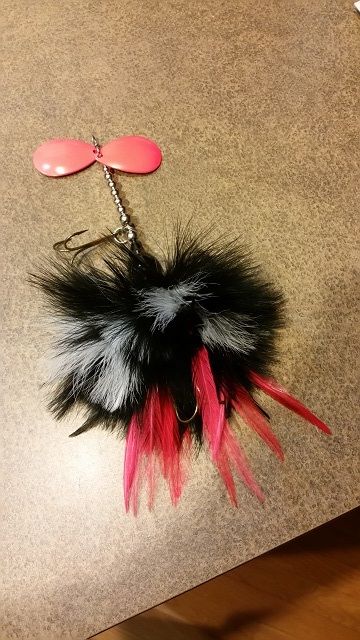
This is the second attempt. I still need to work on the bulkiness of the ties and how I layer everything for the look I want, but overall fairly happy with the progress. Finished product, ignore the pink, it's actually red.
| ||
| buckeye |
| ||
Posts: 38 | What size thread are you using?? | ||
| anderj85 |
| ||
Posts: 273 Location: US | D thread | ||
| crazywaynee |
| ||
Posts: 71 | Try this add a drop or two of dye to the epoxy and mix then you have a matching color for the lure. I am going to buy the one minute and try that making just enough for the lure. All kinds of colors. | ||
| 5th lake Brad |
| ||
Posts: 537 Location: Gilberts IL/Rhinelander WI | The 5-30 minute epoxy turns cloudy once it's fished for a while, maybe adding paint makes it look better. | ||
| anderj85 |
| ||
Posts: 273 Location: US | Yeah, I'm not sure how this will look after some use. Time will tell. | ||

| Jump to page : 1 Now viewing page 1 [30 messages per page] |
| Search this forum Printer friendly version E-mail a link to this thread |


Copyright © 2024 OutdoorsFIRST Media |